Before You Begin
Skill levelBeginner
MaterialFabric scraps
MethodCoiling
TimeA few hours
You Will Need
- Scrap cotton fabric or old clothing
- Cotton clothesline, piping cord or similar soft cord
- Strong sewing thread
- Fabric scissors
- Needle or sewing machine
- Pins or clips if useful
- Optional: thimble for hand sewing
Choosing Scraps
- Cotton and lightweight linen are easy to work with
- Old shirts and pillowcases are ideal
- Mix prints with plain fabric
- Choose strips of similar weight where possible
- Avoid very stretchy or slippery material at first
Nothing needs to match perfectly. In fact, slightly faded colours, tiny prints and odd scraps often make the finished bowl more interesting. This is a project where the leftovers are part of the charm.
Coil the Bowl
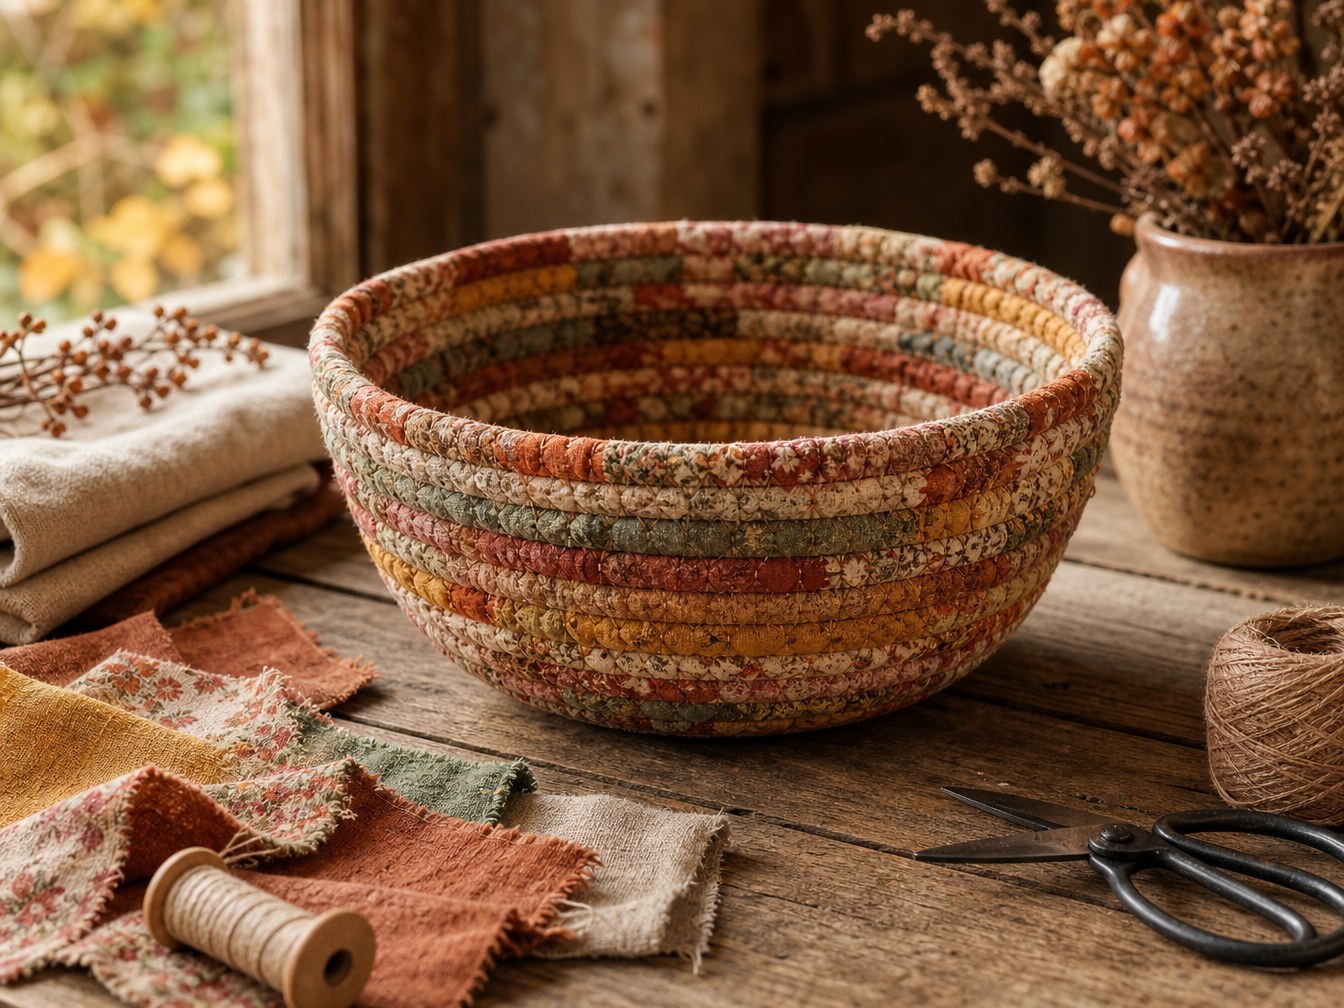
The bowl grows slowly from the centre outward, with fabric wrapped around a cord and each new coil secured to the one beside it.
- Prepare the stripsTear or cut the fabric into strips roughly 2–3cm wide. Join shorter pieces as you go by overlapping the ends while wrapping.
- Wrap the cordWind the first fabric strip firmly around the cord on a slight diagonal so the cord is completely covered.
- Begin the centreRoll the wrapped cord into a tight flat spiral. Secure the first few turns carefully with strong hand stitches or machine stitching.
- Build the baseContinue wrapping fabric around the cord and coiling it around the centre, stitching each new round securely to the previous one.
- Choose the sizeKeep the work flat until the base reaches the width you want. Around 15–20cm makes a useful small bowl.
- Raise the sidesBegin holding the new coil slightly above the outer edge of the base as you stitch. Gradually increasing the angle will make the sides curve upwards.
- Change fabrics freelyIntroduce another scrap whenever a strip ends. You can plan the colours or simply let the bowl develop naturally from whatever is in the basket.
- Finish the rimWhen the bowl reaches the height you like, taper the final fabric strip neatly around the cord and secure the end firmly into the rim.
If using a sewing machine, keep fingers well away from the needle while guiding the coil and work slowly through thicker areas. A handmade bowl is happiest holding light, dry objects rather than food, liquids or anything very heavy.
Let the Scraps Tell the Story
No two bowls need ever look alike. The fabrics you choose can make one quiet and natural, brightly nostalgic or unmistakably autumnal.
Autumn Gatherings
- Rust and faded orange
- Moss and sage green
- Mustard and muted gold
- Oatmeal and warm cream
- Small florals and leaf prints
Use What You Have
- Old cotton shirts
- Worn pillowcases
- Quilting offcuts
- Leftovers from another sewing project
- Fabric that is too small for anything else
Change the Shape
- Keep it shallow for keys or jewellery
- Build higher sides for yarn or sewing notions
- Make a tiny bowl for buttons
- Create a broad basket for larger scraps
- Experiment with gently curved sides
Add a Finishing Touch
- Finish the rim with one contrasting fabric
- Add a small loop for hanging
- Sew on a simple handmade label
- Attach a wooden button to one side
- Leave it plain and let the fabric do the talking
Fill It with Something Thoughtful
For a Maker
Fill the bowl with buttons, thread, ribbon, yarn scraps or little sewing tools for someone who loves making things.
For the Home
Use it as a landing place for keys, jewellery, hair accessories or all the tiny things that otherwise wander off.
For a Hamper
Instead of another disposable container, let the bowl become part of the gift and fill it with small handmade treats.
For the Season
Fill it with pinecones, acorns, dried seed heads or other lightweight autumn decorations for a simple seasonal display.
If the bowl is being given as part of a hamper, the container itself becomes another present — and nothing needs throwing away once everything inside has been enjoyed.
Wrap It as a Gift
Presentation Ideas
- Fill with several small handmade gifts
- Line with tissue or a scrap of soft fabric
- Tie a tag around the rim with twine
- Add a small dried leaf or cinnamon stick
- Leave the bowl unwrapped and make it part of the display
Include a Little Note
- Mention that the bowl is made from reused fabric
- Explain that each piece is naturally unique
- Suggest uses for the recipient
- Recommend spot cleaning rather than soaking
- Celebrate the scraps rather than hiding them
A Little Note to Include
A scrap of card and a short message are all this gift needs.
Nothing Wasted
Pieces once too small to keep
have found a place together.
May this little bowl
hold useful things,
small treasures
and plenty of everyday stories.
Further upcycling projects, seasonal gift notes and printable tags will find their way into the Cottage in time.
Beauty in What Was Left Behind
Scraps do not have to be waste. Gathered together slowly, the smallest pieces can become something useful, colourful and entirely new — a little reminder that making often begins with seeing possibility in what we already have.