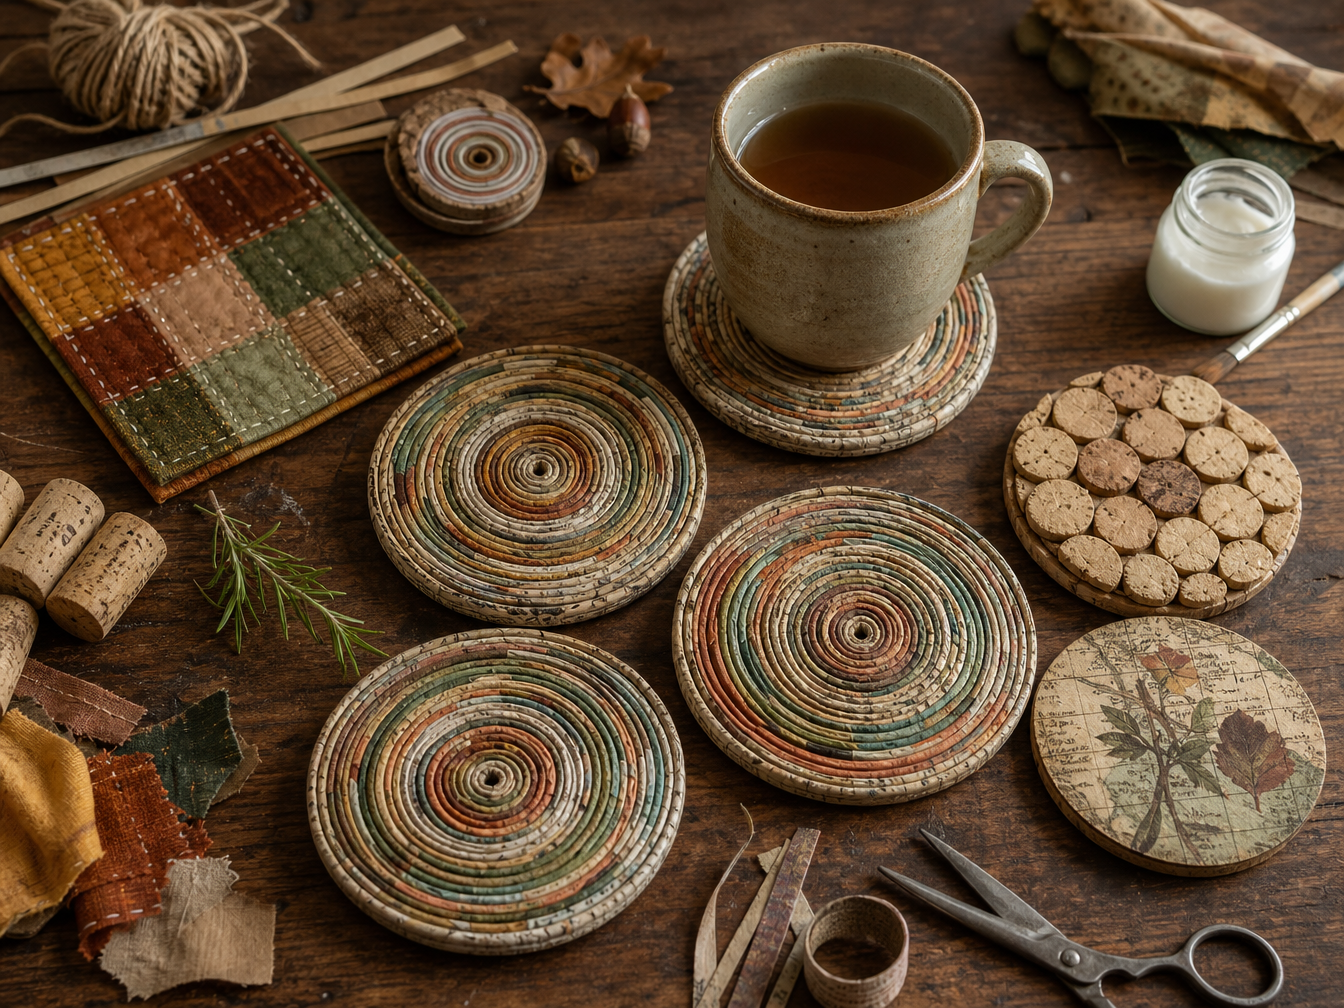
Before You Begin
Skill level
Beginner
Materials
Mostly recycled
Time
An afternoon
Makes
A set of 4
You Will Need
- Old magazines, newspapers or unwanted paper
- A ruler
- Scissors or a paper cutter
- PVA or suitable craft glue
- A small paintbrush for spreading glue
- A flat surface for drying
- A suitable clear water-resistant craft sealer
Paper to Look Out For
- Old magazines and catalogues
- Newspaper and unwanted leaflets
- Leftover wrapping paper
- Brown paper bags
- Old maps or atlas pages
- Damaged gift bags
- Scraps left from other paper projects
Before buying anything new, have a rummage through the paper you already
have. Different colours, print and textures appearing through the finished
spiral are part of the charm.
Making the Coasters
The principle is simple: create long folded strips of paper and coil them
tightly around themselves, adding new strips until the coaster reaches the
size you want.
-
Choose your paper
Pick a mixture of paper that works well together. You can keep to one
palette or let colours and printed words appear randomly through the
finished coaster.
-
Cut long strips
Cut the paper into long strips approximately 2–3cm wide. Try to keep
them reasonably even, but they do not need to be perfect.
-
Fold the strips
Fold each long edge towards the middle and then fold the strip in half
again lengthways. This hides the raw edges and creates a stronger,
narrower strip for coiling.
-
Begin the centre
Take one folded strip and start rolling it tightly from one end. Add a
tiny amount of glue as you go so that the centre does not spring apart.
-
Join another strip
As you reach the end of a strip, overlap the next one slightly and glue
it securely in place. Continue rolling without allowing the coil to
loosen.
-
Build the spiral
Keep wrapping the paper around the centre, occasionally pressing the
coaster flat against the table. Add small amounts of glue between the
layers as needed.
-
Check the size
Continue until the coaster measures roughly 9–11cm across, or is large
enough to hold your usual mugs and glasses comfortably.
-
Finish the edge
Trim the final strip neatly, glue it firmly against the outer edge and
hold it in place until secure.
-
Let it dry
Place the coaster on a flat surface and allow all the glue to dry
completely. If necessary, place a flat board or book over it while
drying to help prevent curling.
-
Protect the surface
Apply a clear water-resistant craft sealer suitable for paper, following
the manufacturer's instructions carefully. Seal both sides and the outer
edge, allowing each coat to dry fully.
Paper and craft sealers vary considerably. Choose a product intended for
the material and expected use, follow its safety and curing instructions,
and test a finished coaster before gifting it. Do not assume a sealer is
heatproof simply because it is water-resistant.
Let the Paper Choose the Look
Part of the pleasure of this project is never knowing quite how the spiral
will look until it is finished.
Quiet & Rustic
- Newspaper
- Brown paper bags
- Kraft paper
- Muted book or catalogue pages
Colourful & Playful
- Magazine pages
- Old gift wrap
- Colourful catalogues
- Painted or printed paper scraps
Personal & Meaningful
- Copies of old maps
- Leftover paper from a special celebration
- Children's drawings that would otherwise be discarded
- Copies of handwritten recipes or letters
Autumn at the Cottage
- Rust and burnt orange
- Ochre and faded gold
- Moss and olive green
- Warm brown and cream
If using something precious or irreplaceable, make a photocopy or scan
first. The Cottage is very much in favour of preserving the original while
finding a new use for the copy.
A Familiar Little Skill
If you have already tried one of the Cottage's coiled or woven scrap
projects, the rhythm of this one may feel surprisingly familiar.
The Same Quiet Principle
Small pieces that seem insignificant become stronger when they are
joined together. Strip by strip and circle by circle, the coaster
grows beneath your hands.
Try It Your Own Way
Once you understand the basic coil, experiment with different widths,
colours and materials. A technique learned in one little Cottage
project often finds its way into another.
What Else Could Become a Coaster?
Paper is only the beginning. Before throwing away small leftovers, ask
whether four of them together might have another life.
Fabric Scraps
Piece together small scraps into patchwork squares and add visible
hand stitching for a soft, wonderfully mismatched set.
Wine Corks
Corks can be sliced and arranged onto a sturdy base to create a
naturally heat-resistant-looking, rustic surface. Use appropriate
tools carefully and choose an adhesive suited to cork.
Old Maps & Paper
Decoupage a sturdy coaster base with copies of maps, botanical
illustrations, old sheet music or scraps of favourite paper.
Bits & Pieces
Wooden tiles, sturdy cardboard, leftover cork sheet and other small
craft remnants may all suggest possibilities. Let what you already
have inspire the project.
Make a Set to Give
Make Them Belong Together
- Use the same papers for all four
- Keep to one colour palette
- Make each coaster deliberately different
- Create one for each season
- Choose paper with meaning for the recipient
Simple Presentation
- Stack four coasters together
- Tie them with natural twine
- Use a leftover strip of fabric as ribbon
- Add a small handmade gift tag
- Include a note explaining what they were made from
A gift made from reused materials does not need to look apologetic.
Thoughtful colours, careful finishing and a simple piece of twine can turn
a handful of scraps into something anyone would be pleased to unwrap.
A Little Note to Include
Copy this onto a tag or small folded card and tuck it beneath the twine.
Made From Little Things
Once only scraps and little things,
now somewhere for your cup to rest.
Made slowly,
used often,
and given a second life.
Seasonal gift tags, care cards and printable little notes will be added to
the Cottage Market in time.
Waste Not the Little Things
Useful things do not always begin with new materials. Sometimes they begin
with yesterday's paper, a little patience and the thought that perhaps
something is not quite finished with us yet.