Before You Begin
Skill level
Beginner
Materials
Easy to find
Time
1–2 hours
Makes
One useful pot
You Will Need
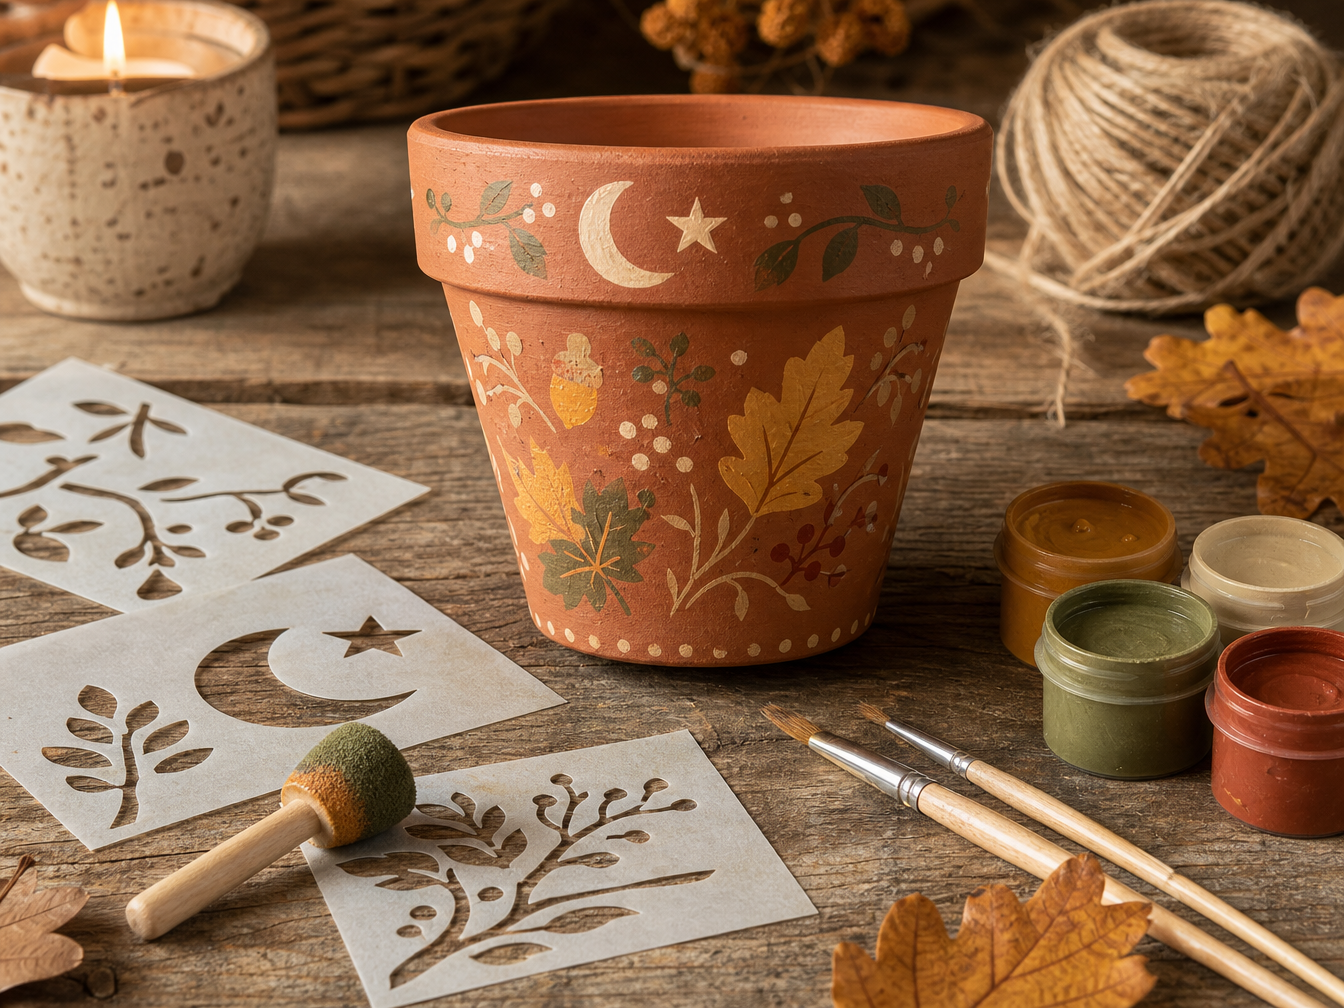
- A clean terracotta plant pot
- Acrylic or suitable craft paints
- Small paintbrushes
- A stencil brush or small sponge
- Simple reusable stencils
- Pencil or chalk for light guidelines
- A cloth or kitchen paper for wiping mistakes
- Optional clear craft sealer suitable for terracotta
Useful Extras
- Masking tape for straight borders
- Natural twine
- Small stamps
- Paint pens for fine details
- Leaves or simple shapes to trace
- Scrap paper for testing colours
You do not need a perfect new pot. A slightly weathered one, an old herb pot
or something already sitting unused in the shed can often have far more
character once it has been cleaned and painted.
Painting the Cottage Pot
There is no single design to follow. Start with a few simple shapes and let
the decoration grow slowly around the pot.
-
Clean the pot
Brush away loose soil and dust, then wash the pot if necessary. Let it dry
completely before painting.
-
Choose a simple palette
Pick three or four colours that sit happily together. Ochre, moss green,
cream, rust and soft brown work beautifully for an autumn cottage look.
-
Plan the main shapes
Decide whether you want a border around the rim, a larger motif on the
front, scattered little designs, or a mixture of all three.
-
Position your stencil
Hold or lightly tape the stencil against the pot. Work with one small
section at a time rather than trying to wrap a large stencil around the
curved surface.
-
Use very little paint
Dab most of the paint from the stencil brush or sponge onto scrap paper
first. A nearly dry brush gives much cleaner stencil edges.
-
Build the colour gently
Dab rather than brush across the stencil. Add several light layers if
needed instead of one heavy coat.
-
Lift the stencil carefully
Peel it away while the paint is still slightly wet and allow the design to
dry before adding nearby details.
-
Add freehand touches
Use a small brush or paint pen for dots, little berries, vines, stars,
veins on leaves or other tiny imperfections that make the pot yours.
-
Let everything dry
Give the paint plenty of time to dry before handling the pot heavily or
adding twine and other decoration.
-
Seal if needed
If the pot will be handled frequently or used somewhere damp, choose a
clear sealer suitable for the paint and terracotta and follow the
manufacturer's instructions.
If the pot will hold a living plant, remember that terracotta naturally
breathes and absorbs moisture. Choose paints and sealers carefully and avoid
coating the inside or drainage hole unless the product is specifically
suitable for that use.
Patterns from Around the Cottage
Stencils make the project easy, but the design can still feel wonderfully
personal. Choose symbols and shapes that belong to your own little corner of
the world.
Woodland
- Oak leaves
- Acorns
- Ferns
- Small branches
- Berries
- Mushrooms
Moon & Sky
- Crescent moons
- Simple stars
- Tiny sunbursts
- Dots like constellations
- Clouds or raindrops
Cottage Folk
- Trailing vines
- Simple flowers
- Little hearts
- Geometric folk borders
- Repeated dots and dashes
Autumn at the Cottage
- Burnt orange
- Ochre and faded gold
- Moss and olive green
- Deep berry red
- Warm cream and brown
If you do not have shop-bought stencils, simple shapes can be cut from
sturdy card or stencil plastic. Even a single leaf, star or crescent can be
repeated around the pot to make a convincing pattern.
What Could the Pot Become?
A painted pot does not have to contain a plant. Once decorated, it can find
all sorts of little jobs around the cottage.
On the Windowsill
- A pot for kitchen herbs
- A home for a small houseplant
- Dried flowers or seed heads
- A little seasonal display
On the Worktable
- Paintbrushes
- Pencils and pens
- Knitting needles or crochet hooks
- Scissors and small tools
For Little Things
- Buttons
- Spools of thread
- Ribbon scraps
- Wooden tokens
- Small collected treasures
As a Gift
- Fill it with seed packets
- Add gardening gloves
- Tuck in craft supplies
- Use it as the container for several small gifts
A Pot Made for Someone
One of the loveliest things about this project is how easily the decoration
can be chosen for the person who will use it.
Choose Their Motifs
A gardener might like leaves and herbs, a moon-watcher might prefer
crescents and stars, while someone who loves woodland walks might get
acorns, ferns and tiny berries.
Choose Their Colours
You do not have to stay with cottage autumn colours. Use the recipient's
favourite shades, match their kitchen or workspace, or paint the pot in
the colours of a particular season.
Handmade does not mean complicated. Often a simple border, one repeated
motif and two carefully chosen colours look more charming than a pot covered
in every design you can find.
A Little Note to Include
If you are giving the pot away, tuck a handwritten tag beneath the rim or
tie one on with a piece of twine.
A Little Pot for Little Things
Painted slowly,
made useful,
and decorated just for you.
May it hold something growing,
something useful,
or simply something you love.
Seasonal gift tags, printable care notes and little cottage labels will be
added to the Cottage Market in time.
Leave a Little of the Hand in It
The line does not have to be perfectly straight and every leaf does not need
to match the last. A handmade pot should still show the hand that made it.
Sometimes the tiny wobbles are the very thing that make it feel at home.