← Back to Useful Little Things
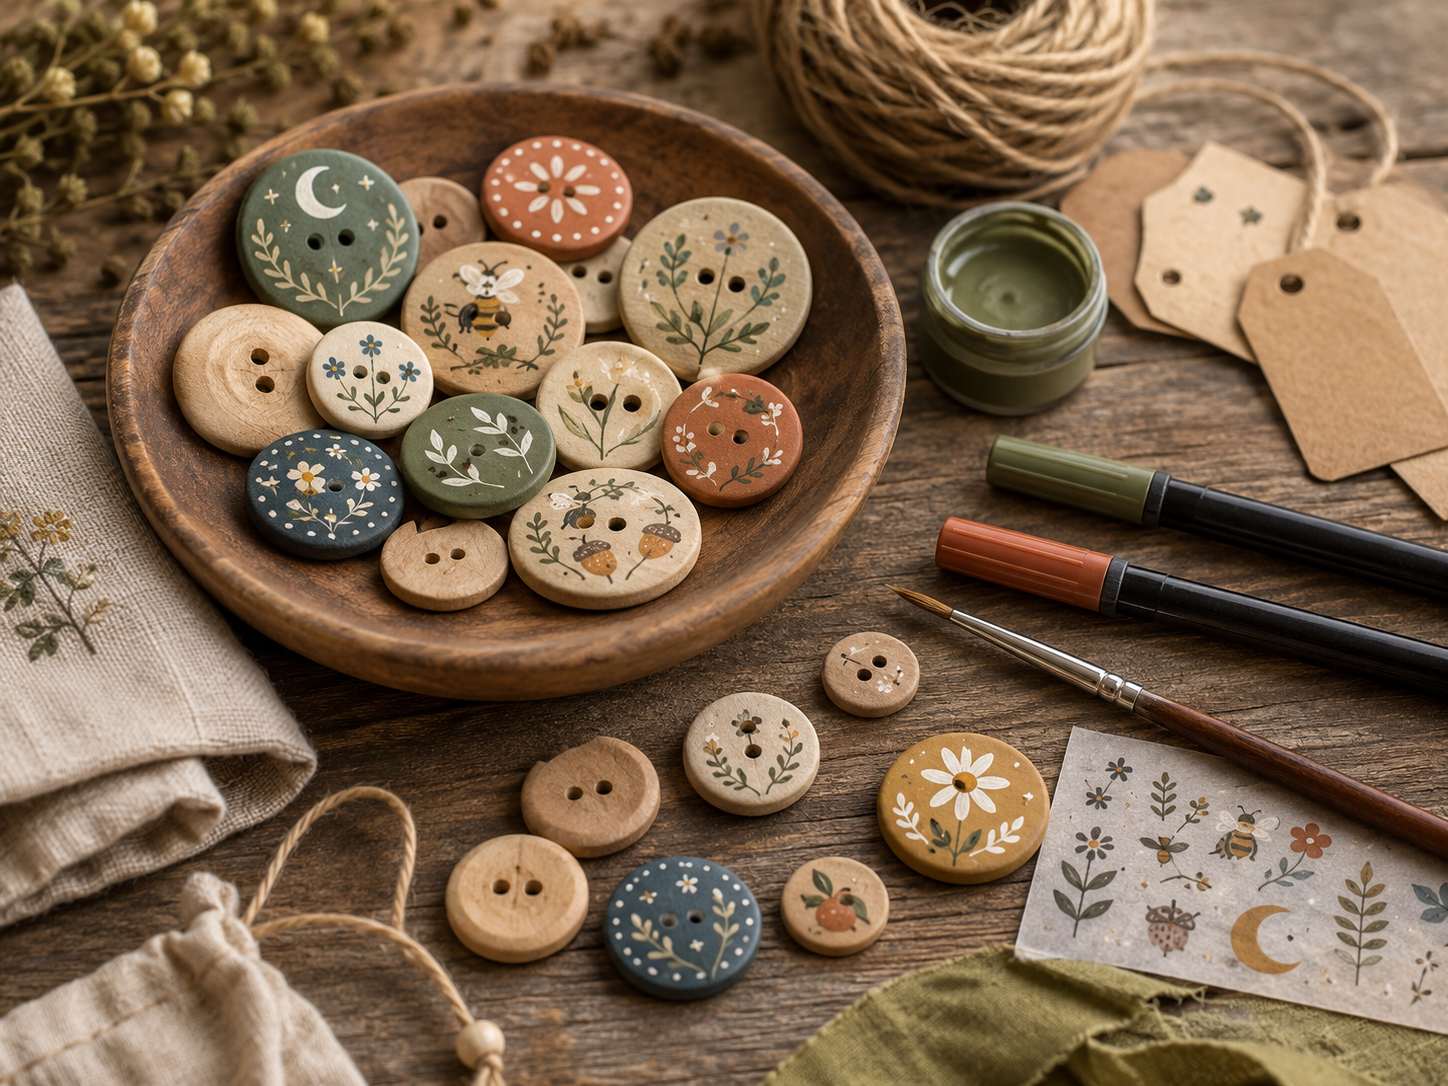
Plain and hand-decorated wooden buttons painted with flowers, bees, leaves, moons and woodland motifs on a rustic worktable.

Small details with plenty of personality

Hand-Decorated Wooden Buttons

Turn plain wooden buttons into tiny, useful pieces of art using simple tools, gentle colours and designs chosen especially for the person receiving them.

What You Will Need

Basic Materials

  • Plain unfinished wooden buttons
  • Fine paint pens or permanent craft markers
  • Acrylic craft paint
  • One or two very fine paintbrushes
  • A pencil and soft eraser
  • Cotton buds or a damp cloth for small mistakes
  • Clear craft sealer or suitable varnish

Optional Extras

  • Tiny stencils
  • Rubber stamps and ink
  • Transfers or decoupage paper
  • Small stickers
  • Tracing paper
  • Masking tape
  • Wood-burning tool for experienced makers

Choose buttons with a smooth, flat surface where possible. Natural grain and slight colour variations can add charm, but deep grooves may make very small designs harder to paint neatly.

Prepare the Buttons

  1. Check the surface Wipe each button with a clean, dry cloth. If the surface feels rough, sand it very lightly with fine sandpaper, then remove all dust.
  2. Plan the design Sketch a few ideas on paper first. Simple shapes work best: leaves, flowers, bees, moons, acorns, dots, initials or tiny woodland animals.
  3. Mark the button lightly Use a pencil to place the main shapes, taking care to work around the holes rather than covering them.
  4. Protect your work surface Place paper or a washable mat beneath the buttons and keep a damp cloth nearby for quick clean-up.

Choose Your Method

Paint Pens

Ideal for fine lines, dots, lettering and simple botanical details. Test the pen on scrap wood first and work in light layers.

Acrylic Paint

Use a tiny brush for leaves, petals and colour blocks. Allow each layer to dry before adding details on top.

Stencils and Stamps

Good for repeating motifs or very neat shapes. Use only a small amount of paint or ink so it does not bleed beneath the stencil.

Transfers and Decoupage

Tiny paper motifs, transfers or stickers can create detailed images without freehand painting. Trim them carefully and seal the surface afterwards.

Wood Burning

Suitable for confident adult makers using an appropriate tool and safe working area. Simple lines and dots can create a beautiful natural finish.

Mixed Methods

Combine a painted background with pen details, or use a transfer with a hand-painted border to make the design feel more individual.

Decorate and Finish

  1. Add the main colour Paint or draw the largest areas first. Keep the layers thin so the wood grain can still show through where you want a natural finish.
  2. Build the detail Once the first layer is dry, add small lines, dots, leaves, stars or outlines. Turn the button as you work rather than twisting your hand into awkward angles.
  3. Keep the holes clear Use a cocktail stick, pin or fine brush handle to remove paint from the holes before it dries.
  4. Let the design dry fully Leave the buttons flat and undisturbed for the full drying time recommended by the paint, pen or adhesive manufacturer.
  5. Seal the surface Apply a thin, even coat of clear craft sealer or suitable varnish. Allow it to dry completely before adding a second coat if needed.
  6. Test before using Rub the finished surface gently with a damp cloth. If colour transfers, add another coat of sealer and allow it to cure fully.

Use non-toxic materials where possible and always follow the manufacturer’s safety instructions. These buttons are decorative craft items, not toys. Avoid using them on clothing or accessories for young children.

Make Them Personal

For a Nature Lover

Try leaves, bees, ferns, acorns, mushrooms, flowers, owls, squirrels or small woodland tracks.

For a Simple Finish

Use dots, stripes, tiny stars, one painted leaf or a single initial in a restrained colour palette.

For a Knitted Gift

Match the design to the yarn colour, or choose one contrasting feature button to become the focus of a neck warmer, scarf or pouch.

For a Seasonal Gift

Add blossom, berries, leaves, moons, stars or tiny seasonal colours while keeping the base design useful throughout the year.

A plain button can become completely different through colour, pattern and finish. The design does not need to be complicated to feel thoughtful.
Using and Gifting the Buttons

Ways to Use Them

  • Finish a knitted neck warmer or scarf
  • Decorate a small pouch or needle case
  • Refresh a cardigan or coat
  • Add a feature to a handmade bookmark
  • Use them on gift tags or fabric wrapping
  • Create a matching set for a sewing basket

How to Present Them

  • Stitch them onto a small kraft card
  • Place them in a tiny linen pouch
  • Store them in a small labelled jar
  • Wrap them with spare thread or yarn
  • Add a care note and the chosen design story
  • Include one plain spare button where possible

Unless the finish is specifically tested as machine-washable, recommend gentle handwashing and avoid soaking. Keep the original materials and sealer details with the care note so the recipient knows how to look after them.

A Little Note to Include

Copy this onto a tag or small card and tuck it inside the parcel.

Made in the Smallest Details

A little piece of wood,
a little colour,
and a design chosen just for you.

May the smallest details
bring the most delight.

Further woodland motifs, miniature stencils, transfers and printable button cards may be added to the Cottage Market in time.

Small Things Carry Character

A button may be tiny, but it can change the whole feeling of a handmade gift. Choose the design gently, keep the finish practical and let one small detail carry a little piece of the maker with it.